Exposure bracketing for images with a high dynamic range
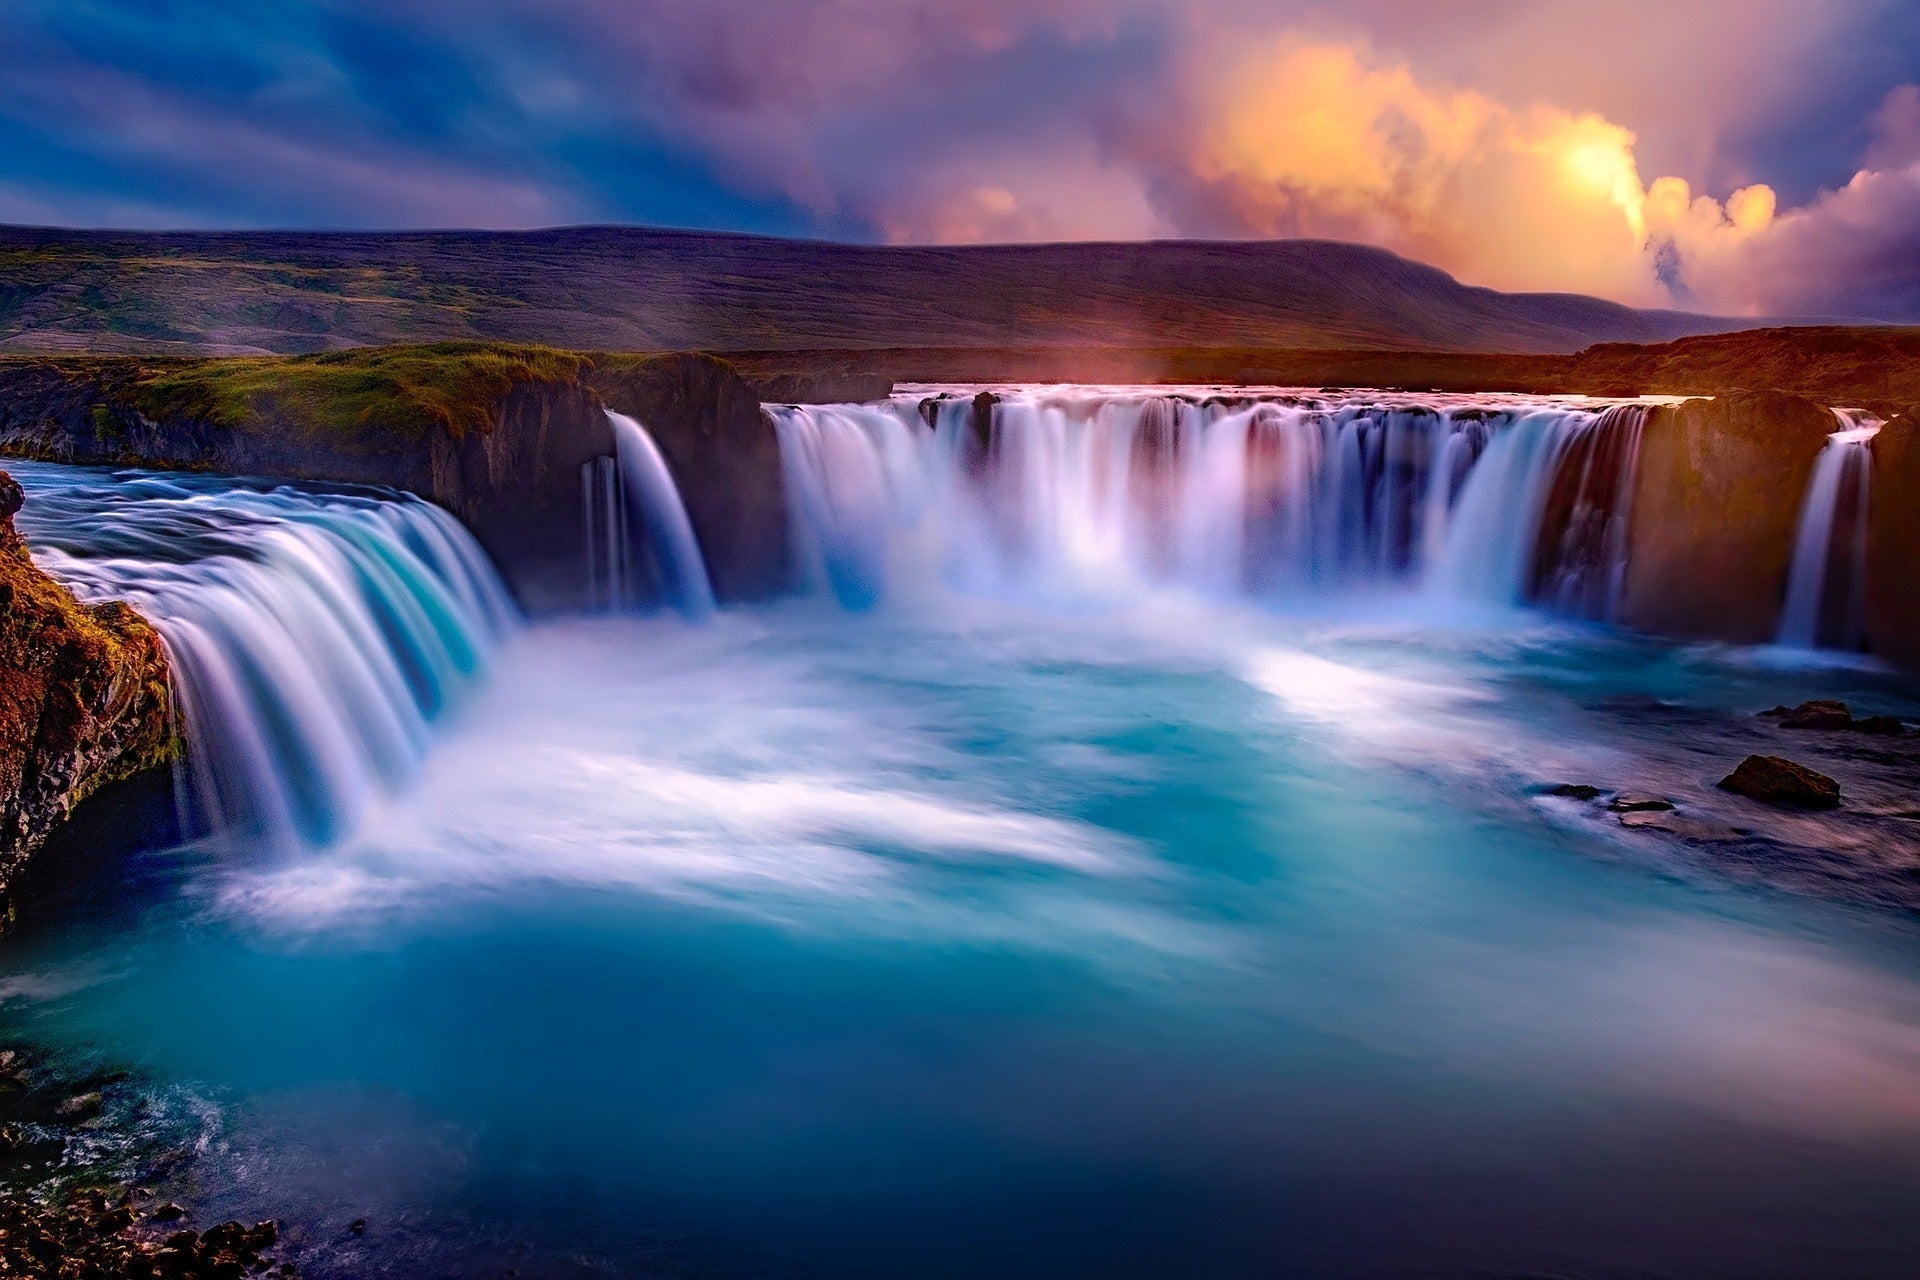
The interplay of light and shadow is particularly effective in high-contrast photos. A scene appears more vivid and spatial when bright areas create visual accents and deep shadows lend structure to the image. Flat and evenly lit images cannot achieve this. For the photographer, the question arises as to how such images with a high dynamic range can be achieved. This is where exposure bracketing comes into play. If you want to take your shots to the next level, you should take a closer look at this exciting technique.
Exposure bracketing: indispensable for a high dynamic range
In photography, dynamic range describes the range between the darkest and brightest tonal values that a camera can capture without losing detail. In this context, it is useful to know the term exposure value (EV). This unit of measurement describes the amount of light that reaches the sensor. If the exposure level is increased by one EV, the amount of light captured is doubled. If we reduce the EV by one, it halves accordingly.
It is typical for today's sensor systems to be able to capture between eight and twelve of these exposure levels without the details suffering. Depending on the subject, even higher dynamic ranges are possible, for example 15 EV or more when shooting outdoors. Of course, it is problematic to work with such levels. The real impression of our eyes is different because our visual system works continuously and not with a grid. In practice, it is therefore necessary to bridge the exposure steps. This is exactly what bracketing is for.
To take full advantage of bracketing, reliable and well-organized equipment is crucial. A well thought-out transport solution with customizable compartments not only protects your camera and accessories optimally, but also allows quick access to everything you need. So you are always ready to capture every scene with the right equipment.

How bracketing works
Exposure bracketing is used to close the gap between the dynamic range of the subject and the dynamic range of the camera. Modern full-frame cameras are very powerful in this respect and can achieve a dynamic range of twelve to 15 EV. But even that is sometimes not enough. A backlit landscape with the sun in the picture may well require 16 to 20 EV. The camera can no longer reproduce this adequately.
To be even more precise, the exposure level gap here is between the EV of the subject and the EV that the camera's sensor can handle in a single shot. Photographers know this as the dilemma of having to "save" either the shadows or the highlights. If the dynamic range of the camera is not sufficient, they have to decide on a section of the tonal value spectrum. The exposure series is the way out of this dilemma. It is based on several partial shots, in each of which a different section of the tonal value spectrum is sharply covered. You can therefore save both light and shadow.
Stability is essential for precise exposure bracketing. A high-quality bag that holds your tripod securely and also offers space for additional equipment makes transportation easier and protects your equipment from external influences. This allows you to concentrate fully on taking the perfect shot.

These are the possibilities offered by HDR photography
HDR stands for High Dynamic Range. This refers to a high dynamic range that preserves more intermediate levels between the deepest black and the brightest white than would be possible with conventional single shots. Real scenes with an enormous range of brightness can be captured without the highlights fading or the shadows closing in. This works because HDR uses a series of exposures in which the camera captures the scene several times in succession, each time with a different exposure time. Fortunately, this no longer has to be done manually, but can be done with modern cameras using automatic bracketing.
With this method, you capture a different part of the tonal value spectrum with each shot, each of which is correctly exposed on its own. Depths can be revealed with longer exposure times and the bright areas of the image with a shorter exposure. Incidentally, the bracket here refers to the bracket that is mentally placed around the assumed ideal exposure. The picture is taken with a nominally correct setting, which can then be supplemented with brighter and darker variants.
In a second step, it is then necessary to combine this series of shots into an overall composition. This is done by software and can also be done manually with a program such as Photoshop if required. However, many camera manufacturers offer automated solutions for this. The images must be precisely superimposed. The result is a fused image with 32 bits. Here, each pixel has the optimally exposed information from the series of images. However, the dynamic range of this file is much too large for our monitors. For this reason, tone mapping is used to compress the data to the displayable range. 32-bit files are ideal for this because they do not produce any tonal value breaks or rounding errors during this process. The final and compressed result still has the desired HDR properties because the original high dynamic range of the scene is retained.
The post-processing of HDR images often requires the use of laptops or tablets. A bag with special, padded compartments for electronic devices, such as the Rocky Mountains 17" photo backpack, ensures that your technology is safely stowed away and remains ready for use at all times. This allows you to edit your pictures directly on location and achieve optimum results.

Tips for HDR photography
If you want to shoot high-contrast subjects, there are a few points to bear in mind in practice:
- Analyze the subject: Take a close look at the subject before taking the picture. Where are the brightest areas, and where does the image threaten to merge into a featureless black in the deepest shadows? Now is the time to activate the histogram and the highlight warning. You should set the exposure bracketing so that clipping does not occur in either the brightest or darkest frames.
- Select RAW format: You should record the exposure series in RAW format. The reason for this is that it is saved with 12 to 14 bits, which offers more reserves than JPEG. Even with a heavily underexposed shot, there are still enough finely graduated shadow values to be able to pull them up again in the HDR master. In this way, blocking or color stripes can be avoided. RAW saves the sensor data practically unprocessed and delivers up to 16,384 brightness gradations per channel.
- Making the right camera settings: Part of a solid photography technique for high-contrast subjects is to set the camera settings so that the aperture and ISO do not change during the exposure time. This is the only way to ensure that the frames are congruent and that there are no shifts in aperture or noise. Useful examples are the shooting modes M or A/Av. When shooting with aperture preset (A/Av), the camera only changes the exposure time during bracketing. The depth of field then remains the same for all frames. A low ISO value is also important for bracketing. This is because it allows the native dynamic range of the sensor to be exposed. And it is precisely this range that is important when the aim is to create successful HDR images. You should also deactivate image stabilization, as even minimal movements are not desirable. You should also set a fixed white balance, as the automatic mode could otherwise lead to slight color jumps.
Flexibility is required when photographing in different environments and lighting conditions. A versatile bag that offers both protection and quick access to your equipment will help you focus on the essentials: capturing impressive HDR moments.
