Light painting: tools and techniques
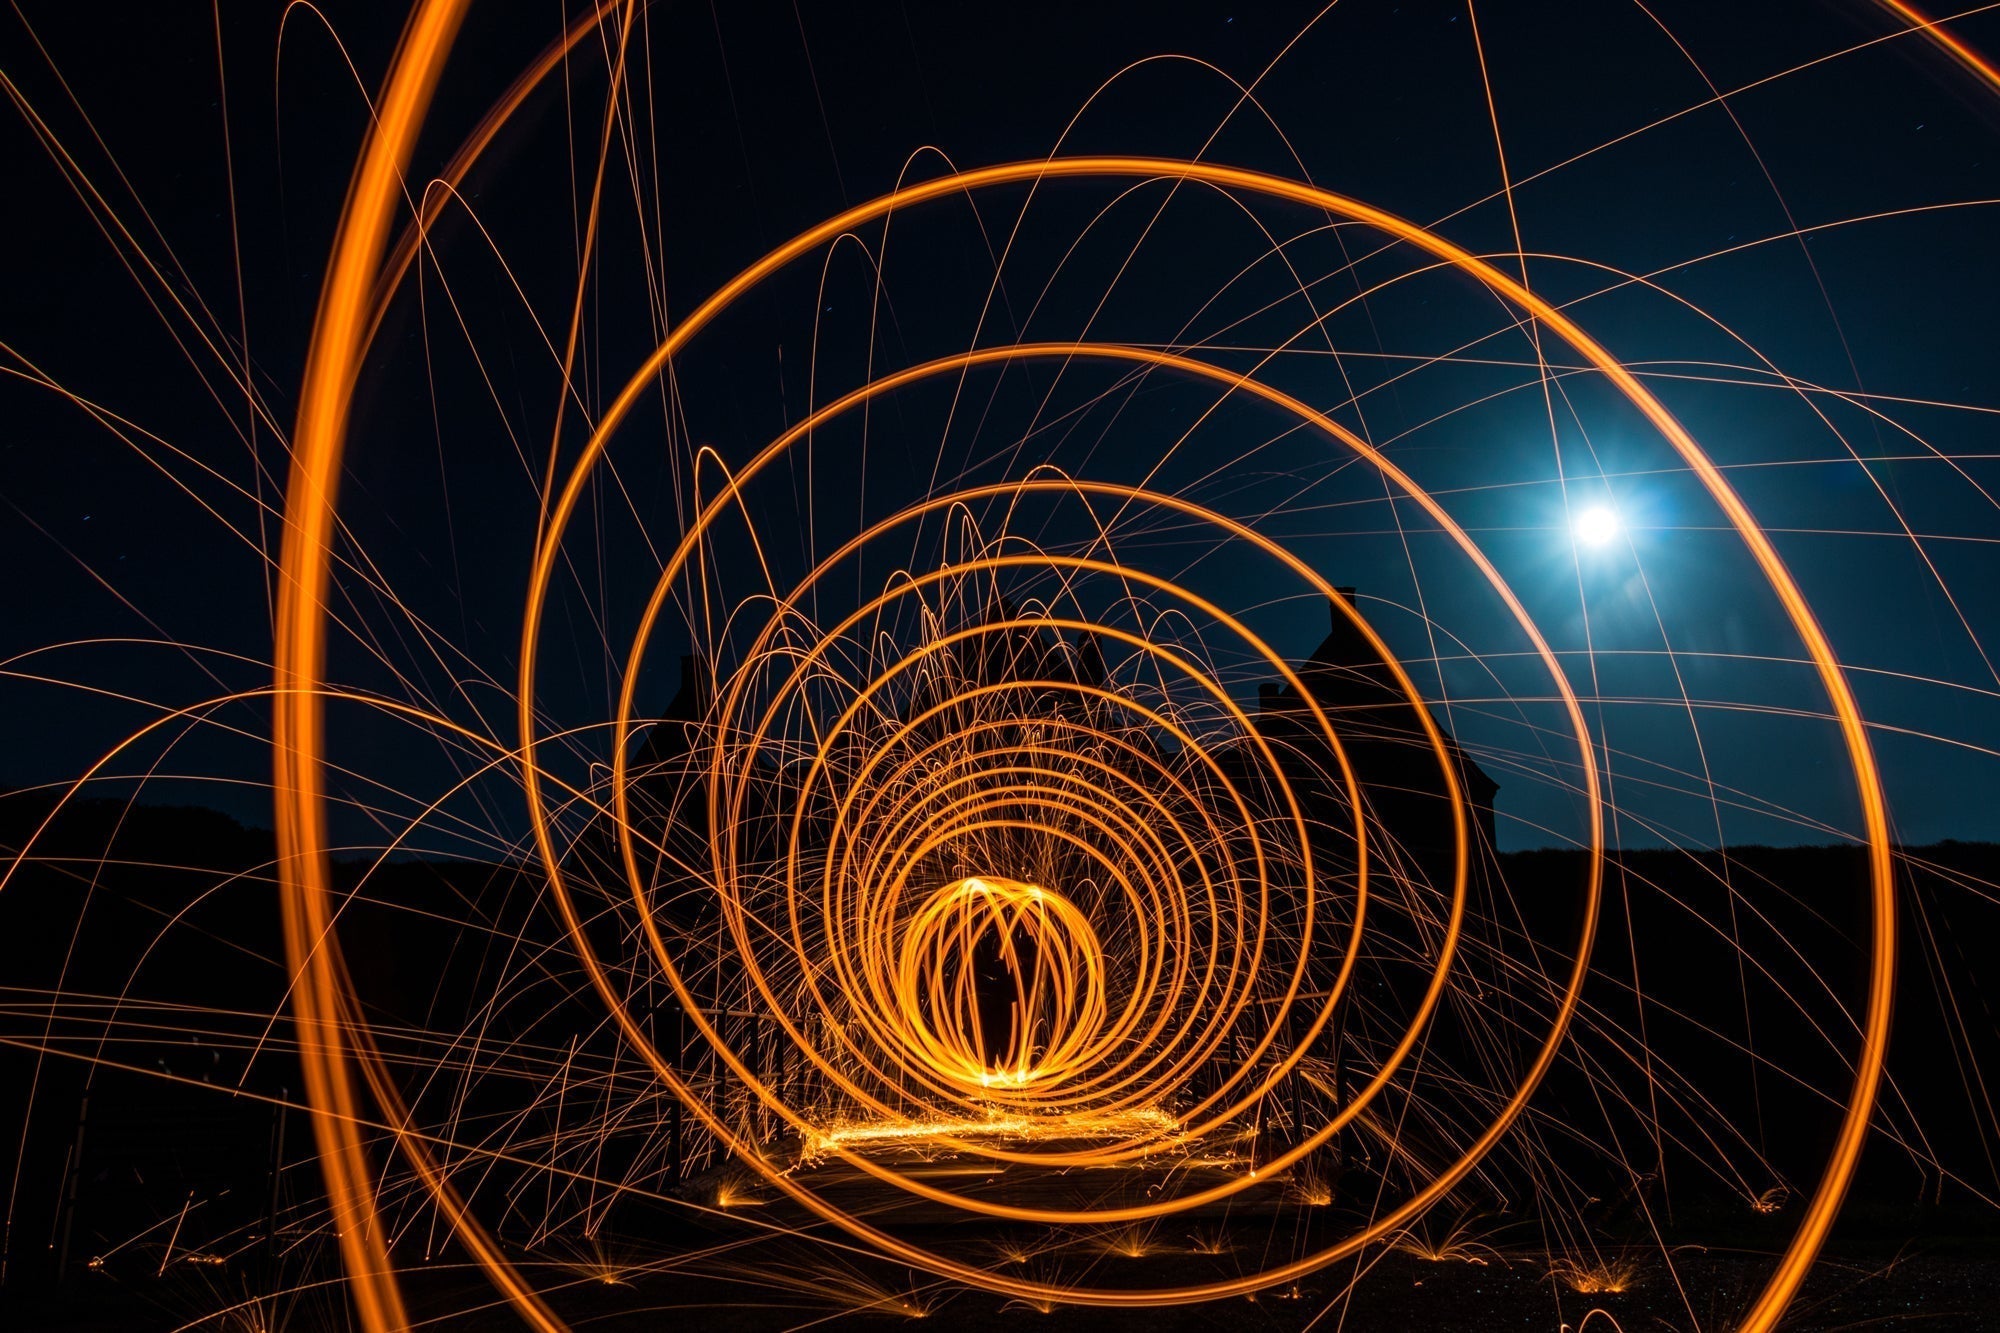
Light painting, also known as light drawing or light graffiti, is a fascinating photographic technique that uses long exposure techniques to "paint" with light. While the camera keeps the shutter open for an extended period of time, all movements of light are captured in the image. This allows the photographer to "draw" shapes, patterns and even entire scenes using different light sources. The result is surreal and often breathtaking images full of colorful lines against a mostly dark background.
The right equipment: light painting tools
The equipment required for light painting is relatively straightforward and inexpensive. The basic requirement is a camera that allows manual settings. Exposure, shutter speed and focus should all be individually adjustable, as this is the only way to have the necessary leeway to create creative light painting works of art. It is also essential to have a good tripod with you to avoid camera shake, which can have a very bad effect on the already moving images. For the same purpose, a remote shutter release is also recommended to prevent camera shake caused by long exposures.
Of course, brushes and paints, i.e. the light sources used, are at least as important as the photographic equipment for light painting. There are no limits to creativity here and both artificial light and candles or torches can be used to create unique effects. Flashlights and LED rods and tubes are often used as they provide an even light source and their colors can often be adjusted depending on the idea and motif.
To ensure that everything fits inside, our Oberwerth camera bags offer the ideal and protected storage space for your camera and everything that goes with it!
If you want to paint spontaneously with light and don't have much with you, you can also draw patterns in the dark with a lighter or even your own smartphone. There are special apps for this that allow you to set color changes. If you want to draw entire patterns in the night, you can experiment with fairy lights, which offer a variety of individual light sources arranged at regular intervals.
There is even more creative scope with the use of color foils, which enable changes in light color, and diffusers, which can scatter the light and make it appear softer. Professionals also use stencils to help them plan the lines better and create more precise patterns and shapes.
Light painting step by step
The most important basic prerequisite that should be met before even attempting to experiment with light painting is darkness. The less ambient light there is, the better the light traces will come out in the photos. If this is the case, the camera should be switched to manual mode and a medium to small aperture such as f/8 to f/16 should be selected. This ensures a greater depth of field in the images. To be able to control the exposure time manually, you should select the camera's bulb mode. Here, the shutter speed can be set individually for each photo, as it depends on the desired length of the light trails and the speed of the movement. If you have little experience with light painting, you can start with a shutter speed of 30 seconds and then adjust the exposure time depending on the results. You should also select a low ISO value such as ISO 100 to minimize image noise and manually adjust the focus to the area where the light painting is to take place.
To ensure that your camera equipment is always optimally protected, we recommend our robust and stylish camera backpacks or camera bags. They offer enough space for your camera and the accessories you need - so you are perfectly organized for every light painting session.
Before you actually start taking photos, you should think in advance about how you want the finished picture to look and plan the composition. Here you can use the golden ratio or the rule of thirds as a guide and place the center of the image in a place that makes the image appear harmonious and balanced.
Once the camera is correctly set up and securely mounted on a tripod and the scene and composition have been planned, you're ready to go! You press the shutter release and the shot begins. Now it's time to move the light sources according to your own ideas. Smooth movements that create clear light trails look particularly beautiful. However, you can only find out what ultimately suits your own style and individual ideas by creatively experimenting with different movements and light sources. It is not only the movement itself, but also its speed that has a decisive influence on the result. There are therefore no limits to your imagination when it comes to light painting and it can be exciting to take different pictures with very small changes in order to compare their effects.
After taking the picture, you can check the result on the camera display and adjust settings, light sources and movements. You can also get a lot out of the pictures in post-processing, but the technical part of the photography should of course be clean from the start.
Advanced light painting techniques
Anyone who has tasted blood and now wants to experiment even more in the field of light painting can fall back on a number of exciting techniques. One interesting example is the so-called stroboscope effect, which is created by quickly switching the light source on and off during the shot. This creates interrupted light trails that can look like broken lines. For easier implementation, there are of course special light sources that switch themselves on and off at regular intervals.
The light shadow technique can also be interesting, in which objects are painted around with light so that their contours stand out in the picture. The use of stencils can also be interesting, as they allow uniquely precise shapes and patterns in light painting. Kinetic light painting, in which the camera does not remain still on its tripod but is set in motion itself, can also be exciting. Generally, a static light source is chosen, which ensures that both the lights and the surroundings become blurred.
Conclusion
Anyone looking at images from the field of light painting will quickly be enchanted and inspired to pick up the camera and get creative. The genre is incredibly versatile and offers a wealth of opportunities to try out new things. The practical thing about it is that it can be realized with the absolute basic equipment of any photographer and does not require any major investment. With simple tools and a little practice, you can create impressive and unique images and explore the possibilities of photography in a new way. The combination of long exposure techniques and direct interaction with light opens up a whole new creative dimension.
At Oberwerth, we appreciate the art of photography and offer your camera high-quality protection and timeless design with our half cases, camera straps and bags. So you and your camera can master light painting and many other exciting projects.